Saturday, November 24, 2012

comparing fractions

Part of our curriculum is to teach our students how to compare fractions.  We focus a great deal on equipping students with strategies for doing this mentally.  They take part in an investigation where they 'discover' these mental strategies.  Though many students dislike the initially struggle, they realize that developing these mental strategies saves them time in the end.  If they just stop and THINK they can often discover which fraction is larger without ever even thinking about 'common denominators.' 

One reality is that sometimes the use of equivalent fractions is necessary and we ask the kids to use common denominators as a last resort. 

This foldable was created with the students AFTER the investigation and BEFORE the weekly quiz.  It was intended to be a summary reference piece.  I created it with the intention of it being used as a FLOWCHART.  If you look closely, students are asked to try one of the mental strategies at the top and then it is suggested that they move to the bottom of the foldable flowchart if one of the mental strategies did not apply.

{all folded up}                     {as you open}

 
{close up of mental strategies-outside}


  {close up of mental strategies-inside}
 
 
{what to do if one of the mental strategies doesn't work}

sometimes life gets in the way

Life has been nothing short of insane since school has started.  I apologize for putting this and my other blogs on hold while I have tried to piece things together.  Though I have incorporated foldables and my new Math Important Book project in my classroom instruction this year, I have failed to document.  I will do my best to soon post what I have done so far this year.

Wednesday, September 26, 2012

coming along!

I am very pleased with the way the Math Important Book is coming along.  The students have had a few opportunities to help determine what sentences 'made the cut' for certain pages.  They have also had the chance to design a few pages of their own, while the other entries have been copies of my designs.  With each week that passes, students will be given a little more independence and choice when it comes to their Math Important Book.

I think I will be very proud of this project by the end of the year.

As usual, the beginning of the school year has been overwhelming and I have failed to do much other than get through the 'day to day.'

I hope to get some pictures of my book, but more importantly, pictures of the kids' books uploaded soon.

Sunday, July 22, 2012

preparations for 12-13

My school preparations so far have not been 'foldable' material, so i didn't feel right posting them here, but i thought i would link to one of my other blogs in case you found your way here and don't know about Pink and Green Polka Dots

And just to give you a little extra incentive to head on over and figure out WHY ON EARTH Flava Flav is making his way to my classroom...

Saturday, June 30, 2012

foldable makes debut in The Math Important Book

I'm in the process of trying to figure out how the implementation of my Math Important Book is going to pan out for next year.

During this I realize I needede an importnat statement about FOLDABLES!  It took me about negative 2 seconds to come up with the statement because i'm OBSESSED with foldables. 

I hope I go down as two things this coming school year:

The Foldable Master and The Math Important Book Genius (hehe)

Tiffany and I decided yesterday in our 1st of many summer planning sessions that the first foldable the kids make will be this one that they will put in their Math Important Book....what a marriage!  ugh....it's almost as good as brownies and birthday cake at the same sitting!


Thursday, June 14, 2012

Check out the new pages!

I really, really, really have been trying to NOT post anything other than foldable information on this blog, but I feel like the other things that I do in class have significance and are closely related to the foldables that I do.  I couldn't hold back anymore...I decided to add a few 'pages' to this blog that feature other things that I do in class that relate to foldables but are not necessarily directly related.  Check them out if you have the time...

Thursday, May 3, 2012

Roll 'em, Flip 'em, Replace 'em, Don't Replace 'em

It's been Probability Week!  I've been used to beginning the year with probability and this year I had to wait until the very last unit.  Oh yes, you heard correctly.  As of tomorrow, we are officially done with our curriculum.  After this, we will review for the Virginia SOL and then do some exciting projects after the assessment.

We began the week reviewing simple probability.  We created this "mixed media" (if it's even worth being called that) notes sheet with a small foldable and other important information about probability.

{notes sheet}

{foldable--up close--outside}

{foldable-up close--outside}


After we had reminded ourselves about the basics of probability we moved into distinguishing between independent and dependent events, and then ultimately between simple and compound events.

{notes sheet}


{foldable--up close--outside}


{foldable--up close--inside}

By today, students could find the probability of any simple or compound event, independent or dependent!  I am very proud of how much they have learned this week.  I know they will do well on their quiz tomorrow!

Monday, April 30, 2012

Mean, Median, Mode, and Range

I can't even begin to describe the work we put our brains through last week when we approached 'mean as a balance point' vs 'mean as fair share.'  Luckily, my kids are amazing and we challenged ourselves and ultimately came out on top, if I must say so myself.

Although most of my kiddos remembered median, mode, and range, I wanted to make sure they had notes in case they forget.  Also, it was important to me to make sure that they had notes comparing and contrasting mean as described above--as a balance point and as fair share.

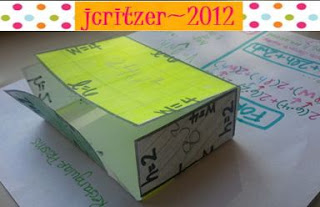
I thought a semi-cootie catcher would do the trick with a little extra love on the 'mean' flap.  :-)


I was very mindful in how each word was written except for 'mean', which I knew would need two separate images for balance point and fair share, so I left the outside word 'normal-looking.'  You can see a green line (barely) under the word 'mode.'  The kids picked up on the idea that the mode is the response or data point that occurs the most often, sort of the way the word 'mode' appears here, as if it were on a line plot (come on, work with me here!).  Range has the arrows to demonstrate that it shows how spread out a data set is.  The picture didn't copy all that well for median, but I watermarked a median in the middle of two neighborhood streets and spread the word 'median' out (in the middle of the word, of course) to make that reference.

You can (kind of) see from the picture above that the mean flap has a flap within the flap.  Here is what is going on there...


Here, I was trying to show mean as a balance point within the phrase with the use of a balance scale.  Notice it is balanced :-)

And the other side to this flap within a flap...


Here I was trying to show that with mean as fair share, you are finding the average by divvying up the data points into even groups, hence, the 4 squares with one letter per box.

When you open the flap within a flap all the way open, this is what we created...


We based our outside flaps on the steps we completed throughout the week as we found mean as a balance point and mean as fair share and we used the example in the middle to show how mean as a balance point can be used to find an estimate when the data cannot be 'perfectly balanced' and then you can find mean as fair share to determine a more specific mean.

For consistency, on the inside flaps of mode, median, and range, we used the same data.


I knew this foldable was going to be pretty cumbersome with all of the gluing and the mind-boggling revisiting of mean as a balance point vs mean as fair share, so I kept the kids writing to a limit in the general descriptions for mean, median, mode, and range.  We just did a little underlining and highlighting.

Friday, April 13, 2012

Pythagoras, O Pythagoras!

I think I mentioned earlier that one of the concepts I miss teaching now that I've switched from 8th grade to 6th grade is The Pythagorean Theorem.

I decided to covered this with the students headed to Algebra next year prior to teaching surface area and volume of cones and rectangular pyramids so that I can incorporate some multi-step problems where they have to find the slant height or the height prior to finding the other measurements.

Here is what I gave each kiddo:


They need both because one is taped down to the composition book and the other is cut and used to prove the theorem.

In order to prove the theorem, we labeled the dimensions of the triangle and the squares and color coded each square.


From there, we cut out one of the pictures along the perimeter and we cut the other picture so that the largest square was still attached to the triangle, but the other two squares were separated. Then, we glued the squares with the triangle intact into our math 'textbook' attaching the triangle only to the paper. From there I showed the kids how one of the remaining smaller squares fit into the larger square and by trial and problem solving, we discovered how the remaining square could be cut to cover the remaining area of the largest square, thus proving the Pythagorean Theorem. I was sure to explain that this is ONE of many proofs, but I really like how the notes became the proof in this case!


Wednesday, April 11, 2012

i have been put to shame!

here i am thinking i am helping the better good and creating foldables and then my PLC partner BLOWS ME OUT OF THE WATER! She created an AMAZING foldable to show the relationships between and among parallelograms.

the best part:

i kept getting to say 'cootie catcher' when i was giving instructions because you fold part of the foldable in like a cootie catcher (fortune teller for those of you still scratching your head trying to figure out what on earth i'm talking about)

need to get her permission to post a picture...ashamed i'm not create enough to come up with anything this cool, but what can i say, she's a genius!

one of my students today said, "you guys should sell all of these foldables you create." how sweet was that : )

Tuesday, April 10, 2012

foldables storage

i will post more on this later, but so far the solution to the potential nightmare with foldables (where and how to store) has been a composition book. I like composition books just about as much as binder clips. it must be a teacher thing. i hoard composition books like crazy. my favorite thing to do with them is to put a book cover on them so that i can store pens and post-it notes in there.
i'm diverging.
moral of the story...i think the composition book will be the foldables BFF. i'm trying it out in tutoring to get confirmation that it is the way to go next year for my classes.

Wednesday, April 4, 2012

list for spring break

this is more for me than anyone else, i guess, but if you have any ideas, let me know!

  • quadrilaterals--relationships, similarities, differences
  • SA and V of pyramids and cones
  • integer operations
  • congruence

Monday, March 26, 2012

best way to store foldables

I am pretty sure this is the reason I took a vacation from foldables in the first place...I had no idea what the best way to have the kids store them.

We are making out okay currently by copying a sheet with a header on it and having the kids glue the foldable to it. From there, they add the page to their 3 ring binder with the rest of their math stuff.

I MIGHT (notice the emphasis on 'might') have come up with a solution for random, vulnerable foldables for the future. I am trying it out with the students I am tutoring before and after school. Rather than adding the foldables to a sheet of paper, we are gluing/taping them into a composition book, hence creating a customized, unique math textbook that can be used as a reference for this year and beyond. I wish I had thought of it earlier, but now I have the time to try it out with tutoring and hopefully identify any glitches prior to implementing the idea with close to 100 kids.

Any thoughts are welcome.

Area of a Trapezoid

First and foremost, let me apologize for the extremely poor quality of these photos.
Covered this with my students moving up to Algebra next year. We don't cover the area of a trapezoid in 6th grade.
As usual, I wanted them to understand the 'why' behind the formula.
We simply took a sheet of paper and hamburger folded it, ripped it, and shared with our neighbor (each student only needs 1/2 a sheet of paper). from there we folded it in half again, hamburger style. Then, we cut some off of the left and right sides to create a trapezoid from the rectangle.
To show that the formula of a trapezoid is 1/2 the height multiplied by the two base lengths added together, we folded the top layer of the trapezoid so that the front showed 1/2 the height. We glued it such that the portion of the trapezoid we cut off matched up with the 'flap' created from the fold.
{unfolded}
{folded up}

squares--perfect or not!

I am in the process of tutoring several students who will be going straight from my 6th grade advanced class to 7th grade Algebra. There are quite a few concepts and skills they will miss if I do not cover them outside of the regular class curriculum, so their parents have been gracious enough to allow me to work with them before school.
One of the concepts I need to cover is Pythagorean Theorem (which I'm really excited about because I was missing it from the 8th grade curriculum). Before I could just jump into good 'ole Pythagoras, I needed to introduce the concept of non-perfect squares, as all I am required to cover in the 6th grade curriculum is the concept of perfect squares.
As I often like to do, I wanted to start with what they knew, and build on that.


pi, good ole pi!

Remember when I said earlier that there can be a lot of pressure associated with being the 1st to teach something to the kids. I found the concept of PI to be the perfect example. Pi is a difficult concept for most adults to wrap their heads around, much less students, and 10-12 year old students at that. My PLC partner and I must have grappled with the concept of pi for an hour one day, going back and forth about is pi a rational number since it's the ratio of the circumference of a circle and that circle's diameter, yet when you look at the numbers they appear to be irrational. Then we got into how pi is really the ratio of two measurements, which forces it to always be an approximation because measurements are always approximations. whew. All of this as we were trying to figure out how to present the concept of PI to students who have limited ratio, proportion, geometry and measurement knowledge.
We tried very hard to choreograph the perfect dance of accurate knowledge without completely blowing their minds!
here is the foldable I came up with in an effort to do just that:
{front}
Just like any other math teacher, I am very hesitate to attach a number with pi, I much prefer to refer to it as the ratio of circumference to diameter (there is a hilarious segment of a stand up on pi that my PLC partner sent me that acknowledges the face that math teachers refuse to refer to pi as anything other than the ratio :-) but that's a post for another time). Okay, back to the point...sorry...I wanted to emphasize the ratio, so I typed up the ratio in fraction notation and made the fraction bar really thick so it wouldn't get overlooked. The kids were responsible for folding the paper in half (hot dog style) and then cutting on the thick fraction bar. I fit 4 of these to a page, so it was a real paper saver, for once. Notice, I also put the pi symbol as a watermark on the front. I created this foldable using ActivInspire software as well as Microsoft Word.
{inside}
The ratios on the right of the foldable (535/170 and 526/168) are both data from a Twizzler activity my PLC partner put together which allowed the students to discover the ratio of circumference to diameter of the same circle. I was trying to point out that neither of these are 'perfectly pi' because they are measurements, but they are close to pi. We also discussed as a class that the more accurate your measurements, the closer your number should be to pi.

Cylinders

Along the same lines as surface area and volume of rectangular prisms, I went with the net approach for the surface area and volume of cylinders. I think it really allowed the students to see the connection between the circumference and the length of the rectangle as well as the connection between the height and the width being the same distance.
{what you cannot see here is the 2nd circle, which has been taped down to the note page. Before we developed the formula, we talked about the cylinder being made of two circles and a rectangle. To develop the surface area formula we talked about need the area formula for a circle twice as there are two circles and then the area of the rectangle, which could be obtained from the circumference multiplied by the height}
Similar to the discovery of the volume of a rectangular prism being the area of the top multiplied by the number of 'layers,' the students discovered that the volume of a cylinder is simply the area of the circle multiplied by the number of 'layers.'

Rectangular Prisms

It seems with every year, you get better and better. Well, one would hope, I guess. I have had the unique opportunity to 'learn all over again' by teaching 6th grade this year. I often am reminded that these kiddos are learning things for the first time and I get to be the one to introduce concepts and skills. As fun as is it, it is also an incredible amount of pressure. I want to be sure I am providing accurate and sound information and on top of that, I want it to make sense to them.
As we talk about formulas, it is important to me that they know WHY the formulas are what they are; I don't just want them to accept them without knowing why. I must have said, "I could have just given you these formulas and said, 'have at it,' but I want you to understand WHY!"
I have never presented the surface area and volume of rectangular prisms in this way, but I think it really paid off.
Here is how we started. I gave them a blank net and asked them what they noticed. Most quickly discovered that there were pairs of rectangles that were the 'same.' We solidified our understanding by clarifying that the areas of the rectangles were the same. I asked them to color code the rectangles so that the same colors had the same area. From there we labeled the rectangles with the exact areas.
I asked the students how they determined the areas of each of these rectangles, which lead us into the conversation regarding the dimensions. Because this is a 2D picture of a 3D object, at first we only labeled all lengths and widths. Before we could completely defend our areas measuring 8 square units, we cut out the net and folded it to create the rectangular prism. We did not tape or glue it together as we would eventually glue it down to our note sheet and didn't want to ruin it trying to un-tape it.
It was at this point, we could start talking about the previously missing dimension~height. The students were now able to defend their areas of 8 square units because they saw that the height of the 'box' was 2 units.
So, this is the part that I did differently from years past. If you look closely, you can see that I started off the derivation of the formula with the numbers from the example, then I showed which dimension each represented, and from there we derived the formula. Now, I'm sure it didn't take the rest of you 10 years of teaching to figure out that was the way to go, but it did me...I need help...but we've already established that :-)
The kiddos picked up the fact that the volume of a rectangular prism was the area of the top (length times width) multiplied by the number of layers (the height). I can't say they discovered this from the net, but rather a 'do now' activity that my amazing PLC partner created.
The kids simply flattened out the net when it was time for them to place in their binders. It was important to me that they had the capability of folding it flat to see the net as well as the capability of folding it up to see the rectangular prism.

Friday, March 23, 2012

Dimensions&Shapes

This week we began our discussion of 3D figures~rectangular prisms and cylinders. Before jumping in, I felt like I needed to address the differences in 1D, 2D, and 3D. This is a short do now I created as an introduction.
Also, before talking about specific formulas, I wanted the students to develop a general understanding for surface area and volume. My amazing PLC partner created a great discovery 'do now' activity that brought the students to the exact general understandings of these two terms through a series of scaffolded questions.
From there, we created this foldable. (not the most attractive, but they did the job)
{front}
{inside of dimensions foldable}
{inside of SA vs V foldable}

Sunday, March 18, 2012

foldables are like chocolate...

you can get addicted...be careful!

foldables have been my answer to everything here lately. i think i might need an intervention.

it all started years ago when i was introduced to them and i have to say, i've been a very sporadic foldable user since until about 2 months ago and now i just can't get enough.

i can barely go a day without using one.

like i said...i need an intervention.

since i've been using them so often, i figured i could use a place to document them, so here i am, starting another blog i more than likely won't keep up with, but whatever...story of my life!